Rivals of Aether hasn’t had any real guides or walkthroughs made since Workshop support debuted a year ago, so here’s an attempt to change that! The goal of this guide is to outline all of the technical aspects for creating a Workshop character, provide links to all the necessary tools and resources, and answer all of the most common hurdles that new creators may run into.
What you’ll need
A computer, a PC copy of Rivals of Aether, a bunch of spare time, and ideally some basic art skills.
Note that when making a character from scratch, over half of the work will involve drawing and arranging your animations! If you’re new to pixel art, consider checking out some pixel art and animation tutorials first, even if you’re using an existing sprite sheet as a base.
Coding skills are very useful, but not essential, depending on the character. Most parts of a Rivals character can be made without any “real” code, and many creators in the community are willing to help with the remainder.
Finally, you’ll have an easier time if you’ve learned the ins and outs of playing Rivals of Aether! Some modders have picked up the game and jumped straight into Workshop, but quickly ran into issues with their character because of a game mechanic they hadn’t discovered yet. I recommend going through the Rivals in-game tutorial before you begin modding.
Downloading a Template Character
The first step to building a character is to choose a template to build from. I would recommend using one of the following:
Sandbert – The “official” template character.
Blank Character Template – A completely empty template.
Sandbert With A Phone – Sandbert with improved code, balanced stats and a bunch of added training-mode functions, made by Muno. Only recommended after you’re familiar with the basics.
While other character mods can be borrowed as templates, not every character is open for free use. Ask the creator for permission before using large sections of a custom mod.

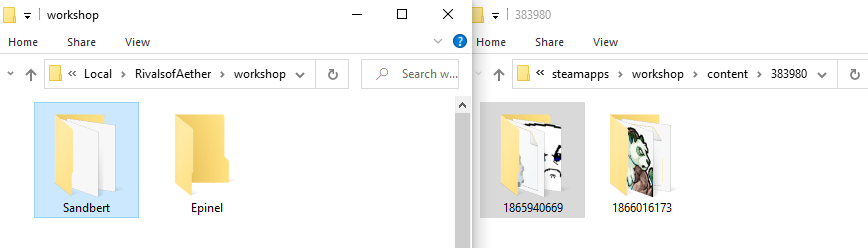
After subscribing to a workshop character, your ‘subscribed items’ folder can be found here: C:\Program Files (x86)\Steam\steamapps\workshop\content\383980
Next, find your ‘local’ Rivals of Aether folder here: C:\Users\{Your Account}\AppData\Local\RivalsofAether
Create a folder named ‘workshop‘ in your ‘local’ RivalsOfAether folder if it doesn’t exist already. Then copy-paste your template(s) into this new folder.
If you can’t find the folders, try checking your other storage drives. You can also try searching for RoA’s steam ID (‘383980’) for the ‘subscribed items’ folder, or searching APPDATA manually (Start -> Run -> %APPDATA%) for the ‘local’ folder.
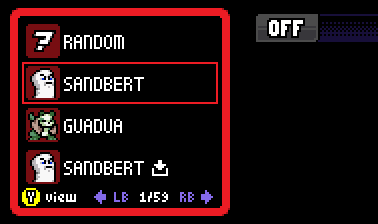
If everything is set up correctly, you should see your ‘local’ character in your workshop character list in-game. (Local characters won’t have a ‘subscribed’ arrow symbol next to their name.)
Setting up GMEdit
GMEdit is the recommended code editor for Workshop characters. With the ‘dialect’ installed, it features auto-completion for Rivals-specific names, functions and values. If you have your own editor that you prefer to use, you can skip this step.
Download the *BETA* version of GMEdit. Run it, then click Menu (≡) -> Preferences -> GML Dialects Directory (at the bottom).
Next, download a RoA Dialect. [ ExW Updated Dialect (by Supersonic) / Official, but outdated Dialect ]
Extract it and place it into the dialects directory.

Finally, restart GMEdit, and drag your character’s config.ini into the GMEdit window. If everything is set up correctly, all of the character’s files will now display inside GMEdit.
Editing Your Character’s Name and Base Stats
In your character folder, the file ‘config.ini’ contains important details like your character’s name, description, author and item type. For new characters you should erase the “url” tag. You can also set your character’s name and other information by editing the values in this file.

‘scripts/init.gml’ contains your character’s base stats, and other base variables. See the Workshop Player Variables list to see what all of them do. If you are using Sandbert as a template, it is very important that you edit these entirely, as Sandbert’s stats are much stronger than the average character.
Take special care when editing your character’s ‘hitstun_grav’ (default 0.5) and ‘air_friction’ (default 0.04). Even slight changes to these numbers can have a big effect on a character’s weight and survivability. For everything else, use the Rivals General Stats Sheet for a good point of reference.
Try changing some numbers around, then open up Rivals’ Training Mode and test out the character. Rinse and repeat until your character’s movement fits what you are aiming for. In Training Mode, you can press F5 to reload the character and test your changes quickly.
Editing Your Character’s Attacks
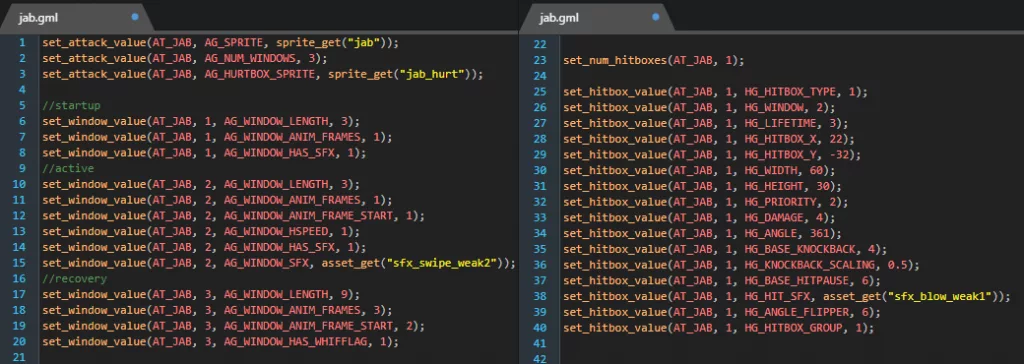
Attack information is stored in the ‘scripts/attacks’ folder. In the files listed here, Attack stats and properties are defined with a long list of ‘Grid Indexes’. The rows of indexes and numbers here are what defines all of your frame data, hitboxes, sound effects and everything else.
Grid Indexes can be separated into three categories: ‘Attacks’, ‘Windows’ and ‘Hitboxes’. ‘Windows’ can be thought of as a group of animation frames. Each ‘Attack’ has a set number of ‘Windows’ that are cycled through in order. Then, each of the attack’s ‘Hitboxes’ can be set to appear during a specific window frame.
Grid Indexes can be difficult to get the hang of at first, but are not too complicated in practice. You can check through your template or browse other characters for examples of how attacks can be set up. (Should you wish to copy and use substantial amounts of another workshop character’s attacks, make sure to ask the author first.)
See the full list of Attack Grid Indexes for arranging your attack’s animation frames and behavior.
See also: RoA Workshop Guide – Explaining Attack Windows
Sprites
UI sprites and portraits go into the root folder, while all other spites go into the ‘sprites’ folder. You can find a list of the sprites you’ll need to make here and here. Rivals Workshop supports adding as many additional sprites as you like.
Each sprite needs to be saved as a transparent .PNG. Animations must be in a horizontal strip format, and their filename needs to include the number of frames in the animation. (e.g. an 8-frame idle animation should be titled “idle_strip8.png“).
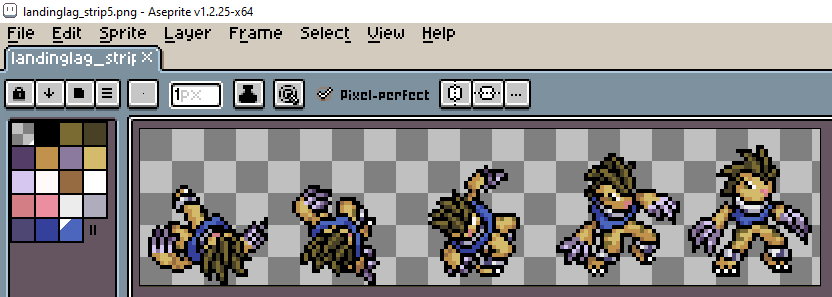
Rivals character sprites are scaled up to 200% in the game files. Therefore in most cases you’ll need to export your sprites at 200% size as well.
When you want to assign a sprite to a Grid Index (or anything else), use the function sprite_get(“attack_filename_goes_here”). For example, sprite_get(“idle”). Don’t include the “_strip” suffix when typing the sprite’s name.
Load.gml and Sprite Offsets
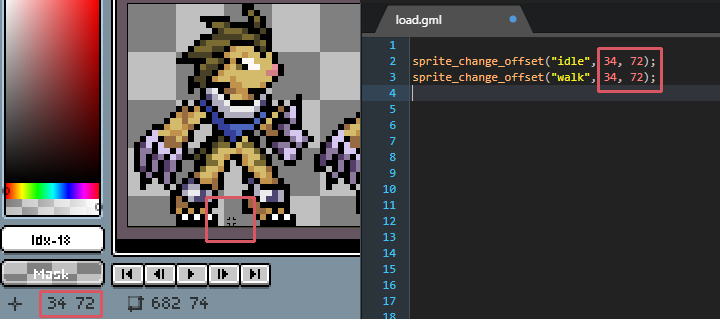
When first adding your sprites into Rivals, you may find that your character is floating above ground or clipping into the floor. To fix this, you will need to change the origin point of your sprites in the script ‘load.gml’. The origin point should be at the bottom center of your character. Use your sprite editor to find the correct coordinate, then assign them in ‘load.gml’ using the function ‘sprite_change_offset()’.
For editing and creating animations, I recommend Aseprite (costs $15), Piskel, GraphicsGale or Pixelorama. These software are dedicated for pixel animations, but any image software you are familiar with can also work.
Assigning Sound Effects
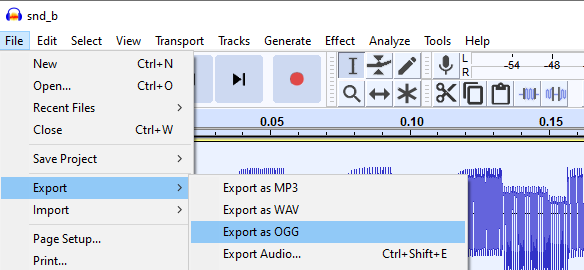
All sounds and music go into the ‘sounds’ folder. Sounds must be in ‘.ogg’ format – ‘.mp3’s and ‘.wav’s won’t work and must be converted first. You can use the free software Audacity to do this. (Open a sound, then select File -> Export -> Export as OGG. )
When you want to assign a custom sound to a Grid Index (or anything else), use the function sound_get(“sound_filename_goes_here”). You can also use the sound_play() function to play a sound manually. Finally, you can set your character’s victory theme with the function set_victory_theme().
As well as your own sound effects, you can also use Rivals of Aether’s default SFX List. Note that when referencing default SFX, you must use the function asset_get(“sound_name”), not sound_get(“sound_name”). For example, to play Kragg’s rock throw sound effect, you could use sound_play( asset_get(“sfx_kragg_throw”) ).
Advanced Scripting
For any advanced attacks and character behavior, you’ll need to dive into character scripts. Rivals Workshop mods use GML (short for Game Maker Language). It is similar to JavaScript and relatively easy to learn. While this guide won’t teach how to code, we will briefly outline the important Rivals-specific parts.
update.gml runs once every in-game frame (60 times a second), so use this script for passive effects and custom character behavior. Most update.gml scripts work by checking the character’s ‘state’ and ‘state_timer’ variables, and performing different behaviors based on these variables.
attack_update.gml is similar, except it only runs while the character is performing an attack. You should use this script whenever you want to make custom attack behavior. Here, you can check the player’s ‘attack’ variable to see which attack they are performing, and the ‘window’ and ‘window_timer’ variables to check which window and frame of the attack they are currently performing.
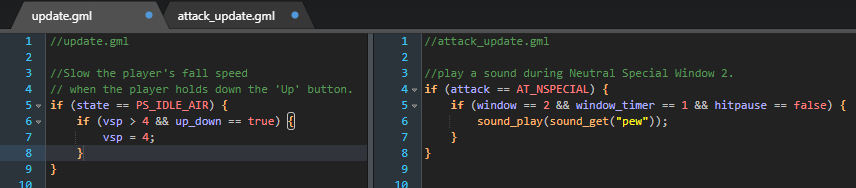
Tip: when a character is in ‘hitpause’, the ‘window_timer’ variable will be frozen. Remember to check if (hitpause == false) { } when running any code that should only happen once, e.g. when playing a sound effect.
You can find a full list of character variables here, character scripts here, and Workshop-compatible GML functions here.
Uploading Your Character
When you’re ready to upload your character, first double-check your config.ini file. Delete the ‘url’ tag if you are uploading a brand new character; leave the ‘url’ tag in if you are updating a character you have already uploaded.
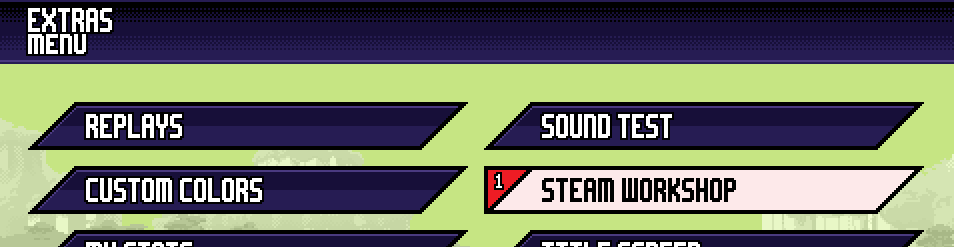
Run Rivals Of Aether, go to Extras -> Steam Workshop, locate your character, and press the Start button / Enter key to upload to the Workshop. Make sure you have no unnecessary files included in your character folder, as they may be deleted upon uploading.
If your character fails to upload, ensure that you have all of the necessary sprites and files listed at the bottom of the official workshop intro guide.
The “Too much of a good thing.” error message normally means that your character’s ‘preview.png’ file size is too big. Try reducing its dimensions to 960×540, or use a compression service like TinyPNG to shrink it.
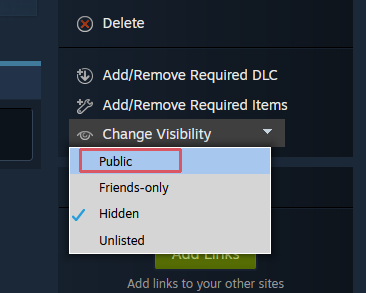
When complete, your character’s Steam Workshop page will appear, letting you update the page’s description and images as you wish. Afterwards, simply change the page’s visibility to ‘public’ to publish your character.
Final Tips
- *Make frequent backups.* Spare USBs, Google Drive, Dropbox, Github, or even just upload private builds straight to Workshop – there’s no excuse for not having an extra copy of your work. Several community members have lost weeks of art and code over a failed hard drive, don’t let this happen to you!
- Pressing F5 in Training Mode will reload your character. No need to go back to character select each time.
- Pressing Ctrl+8 in Training Mode will open the debug log. If one of your character’s scripts isn’t running correctly, you may find the error logged there.
- Switch between testing your character and playing the base Rivals cast every few minutes or so. This is the easiest way to check that your character ‘feels’ like a typical Rivals character.
- If you upload a private version of your character for testing, it is a good idea to upload your finished character as a brand new item. Only brand-new items can appear on the Steam Workshop front page, so doing this will allow your character mod to get as much exposure as possible.
- Trying to find a certain software or resource mentioned earlier in this guide? You can find them all (and many more useful links) in the RoA List of Tools and Resources.
- Finally, consider joining the Official Rivals Of Aether Discord Server to share your work and get feedback on your creations, or ask questions about anything not covered in this guide.
Disclaimer
Use any advice or software listed here at your own risk. Make sure to only download software from the official sources. I’m not responsible if your pc spontaneously combusts.
Update Log
10/06/21 – v1.3 – Added some missing links and function names.
25/03/21 – v1.2 – More minor typo fixes. Thanks @Delta_Parallax on Twitter.
15/02/21 – v1.1 – Small clarification updates and fixed typos.
11/12/20 – v1.0 – First version. Anything that can be improved upon, kindly let me know.
Leave a Reply